How to Fix a Leaky Tub Faucet
A leaky tub faucet can be a major nuisance, wasting water and money. Fortunately, it's a relatively easy fix that you can do yourself with a few simple tools.
Here's what you'll need:
- Adjustable wrench
- Screwdriver
- New washer (if necessary)
- PTFE tape (optional)
- Rag
Instructions:
- Turn off the water supply to the faucet. This is usually located under the sink.
- Remove the handle of the faucet. There may be a screw or set screw that holds it in place.
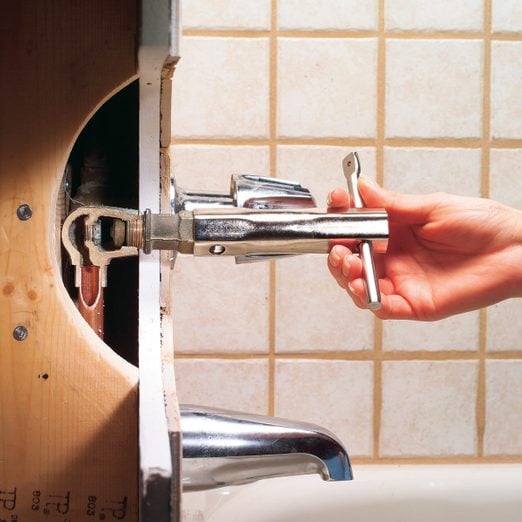
- Once the handle is removed, you should see the cartridge. This is the part that controls the flow of water.
- If the cartridge is worn out, you will need to replace it. To do this, remove the old cartridge and take it to a hardware store to get a new one that matches.
- Once you have the new cartridge, slide it into place and replace the handle.
- Turn the water supply back on and test the faucet to make sure it is no longer leaking.
Here are some additional tips:
- If the faucet is still leaking after you have replaced the cartridge, you may need to replace the O-ring. This is a small rubber ring that seals the cartridge in place.
- You can use PTFE tape on the threads of the cartridge to help make a watertight seal.
- Be careful not to overtighten the handle or cartridge, as this can damage them.
If you are not comfortable fixing the leaky faucet yourself, you can always call a plumber. However, fixing a leaky faucet is a relatively easy DIY project that can save you money.
Troubleshooting a Leaky Tub Faucet
If you have followed the instructions in the first part of this blog post and your tub faucet is still leaking, there are a few other things you can check.
- Make sure that the water supply to the faucet is turned off.
- Check the washers. The washers are rubber seals that help to prevent leaks. If they are worn out, they will need to be replaced.
- Check the O-rings. The O-rings are the small rubber rings that seal the cartridge in place. If they are worn out, they will need to be replaced.
- Check for any loose or damaged parts. If you find any loose or damaged parts, they will need to be repaired or replaced.
If you have checked all of these things and the faucet is still leaking, you may need to call a plumber.
Preventing Future Leaks
Once you have fixed the leaky faucet, there are a few things you can do to prevent it from leaking again.
- Clean the faucet regularly. This will help to remove any dirt or debris that could cause the faucet to malfunction.
- Lubricate the moving parts of the faucet. This will help to keep them working smoothly and prevent leaks.
- Inspect the faucet regularly for any signs of wear or damage. If you find any problems, have them repaired right away.
By following these tips, you can help to keep your tub faucet in good working condition and prevent leaks.
Conclusion
Fixing a leaky tub faucet is a relatively easy DIY project that can save you money. By following the instructions in this blog post, you can fix your leaky faucet and prevent future leaks.
Keywords: leaky tub faucet, fix a leaky faucet, replace the cartridge, replace O-ring, PTFE tape, DIY plumbing, troubleshooting, prevention


0 Comments